Most DIY container garages fail in the same three phases — and it’s not because of design or grit. It’s because of overlooked technical missteps that inspections, weather, or poorly chosen materials later expose. Unlike traditional construction methods, container conversions present unique technical pitfalls that require a different approach and understanding. From improperly anchored foundations to electrical systems that won’t pass code, this guide breaks open the “messy middle” behind every glossy garage build photo.

Why Do Most DIY Container Conversions Fail?
The honest truth? Because most guides skip the hard parts. Inspiration videos show time-lapses and before/after photos, but skip the complex, code-bound middle: permitting, foundation engineering, condensation prevention, and structural modifications.
Many people are inspired by container conversions not only for their unique look but also for the perceived cost effectiveness of container garages compared to traditional construction options. Many first-time builders assume, “It’s just a metal box, how hard can it be?” But that assumption overlooks five of the most frequent fail points flagged by inspectors and building forums:
-
Improper foundations that shift, heave, or fail wind-resistance requirements
-
Wall cavities that create moisture traps and promote mold
-
Structural cuts that weaken the container frame
-
Electrical systems installed without proper grounding
-
Ventilation plans missing entirely
If you’re reading this, you’re not just browsing ideas — you’re battling a real project or planning one with tangible stakes: budget, time, local approvals, and functionality. Missing key steps or making mistakes can result in significant additional cost. This guide gives you the project intelligence others skip.
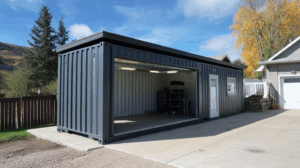
Choosing the Right Container: Avoiding Costly Mistakes Before You Start
Selecting the right container is the foundation of a successful shipping container garage project. Before you buy, take a hard look at how much space you actually need—are you parking one car, two cars, or using the container garage for tool storage and extra storage space? Standard shipping containers come in 20-foot and 40-foot lengths, but don’t overlook high cube containers if you need extra headroom for larger vehicles or want to add overhead storage.

Think about your available site space and how the container will fit with your existing structure or property lines. If you’re planning a two container garage or want to join two shipping containers side by side for a larger room, measure carefully to ensure you have enough space for both the containers and access.
When it comes to condition, you’ll find options ranging from new shipping containers (often called “one-trip” containers) to used containers. One-trip containers cost more but typically require less refurbishment—they’re clean, structurally sound, and free from major rust or dents. Used containers are more budget-friendly but may need repairs, rust treatment, or a fresh coat of paint to ensure a long-lasting container garage.
Choosing the right container up front saves you from expensive surprises and rework down the line. Take the time to inspect containers in person if possible, and always verify that your chosen container meets your needs for space, durability, and layout before you commit.
What Concrete Slab Foundation Mistakes Derail Entire Builds?
Misconception: “Set it on a gravel pad or some blocks and it’ll hold.” Reality: Most inspection failures begin here.
Container garages might weigh 8,000+ lbs unloaded, but dead weight isn’t structural logic. They need frost-proof support, tie-downs for wind, and engineering that aligns with local seismic categories.
What Smart Builds Do Instead:
-
Use a concrete slab foundation, which is a popular and cost-effective option for ensuring stability and longevity in container garage builds.
The 3 Most Common DIY Foundation Errors:
-
Gravel Pads Without Anchoring
Expect container shift during storms, even with loaded interiors. -
Shallow Footers That Ignore Frost Lines
Leads to frost heave, jammed doors, and warped steel floor frames during seasonal cycles. -
Railroad Ties or Block Piers Without Approval
Frequently rejected by municipal inspectors; often require a completely new foundation to proceed.
What Smart Builds Do Instead:
-
Soil compaction tests and frost-line depth analysis
-
Engineering calculations for wind load tie-down strength
-
Regional-rated anchor systems (use our frost-depth and seismic maps for your zone)
-
Concrete pier or monolithic footers sunk below frost line
-
Reinforcement with specialized anchor brackets like the RamJack anchor system for high-wind counties or seismic regions
⏱️ We analyzed 28 failed DIY garage timelines. Rebuilding a foundation after initial inspector rejection added an average of 6–9 weeks. Average cost: $7,800 in rework.
Permits and Regulations: The Legal Traps That Can Shut Down Your Project
Before you start building your shipping container garage, it’s essential to get clear on local regulations and permitting requirements. Skipping this step is one of the fastest ways to stall—or even shut down—your project. Most municipalities treat a container garage as a permanent structure, which means you’ll likely need to secure necessary permits before placing a shipping container on your property.
Start by contacting your local building department to ask about zoning laws, setback requirements, and any restrictions on the use of shipping containers as garages or sheds. Some areas have specific rules about container placement, container size, and even the appearance of your container garage. You may also need to provide site plans, engineering details for your foundation, and proof that your design meets local building codes.
Don’t forget to check for environmental regulations, especially if your site is near wetlands or in a floodplain. Failing to comply with local regulations can result in fines, stop-work orders, or even forced removal of your container garage.
By doing your homework and securing all necessary permits before you start, you’ll avoid costly legal headaches and keep your shipping container garage project on track.
Why Insulation + Ventilation Are Mold Traps in Waiting
The biggest post-build complaint we see in forums isn’t structure — it’s climate control. Specifically: “It’s dripping inside,” “my tools started rusting,” or “it smells musty after rain.”

Improper insulation and ventilation can be especially problematic in extreme weather conditions, leading to greater risks of condensation, mold, and temperature swings.
Why DIY Insulation Usually Fails In Containers:
-
Fiberglass batts allow moist air to enter but can’t escape. The cold container walls condense air into liquid, trapped inside the wall cavity.
-
Open-cell spray foam is breathable but absorbs moisture, defeating its purpose in sealed steel environments.
-
Foil-faced board + steel wall = dual vapor barrier. Moisture gets sealed in. Mold follows.
Pro-Grade Insulation Strategy:
-
Closed-Cell Spray Foam: This is the insulation of record in successful garages.
-
Creates an R-value-rated thermal break
-
Acts as the only vapor barrier (no double-sealing)
-
Fills micro-gaps where steel and wood framing meet
-
-
Ventilation Essentials:
-
Passive air inlets to circulate outdoor air
-
Roof-mounted exhaust fans to expel heat and humidity
-
Vent paths driven by your regional dew point and insulation strategy
-
✅ Builders in North Carolina and Michigan report temp drops of 12–18°F and 80% moisture reduction with properly balanced passive + powered ventilation systems.
What Structural or Electrical Errors Will Send You Back to Square One?
Most container garage projects require cutting — whether for garage doors, windows, or wall-mounted AC units. But every cut compromises structural integrity unless it’s reinforced properly. Properly joining metal components is essential during these modifications, as it ensures the structure remains sound and helps manage overall construction costs.
Structural Shortcuts That Fail:
-
Cutting garage door openings without portal frame reinforcement
-
Adding roll-up doors with bolt-on kits that don’t substitute for welded framing
-
Skipping edge-column reinforcement, leading to warping & stress cracks
DIY builders often cut first and learn about structural loading later — typically when the container starts to flex or after an inspector flags the modification. Worse: these errors aren’t always visible right away.
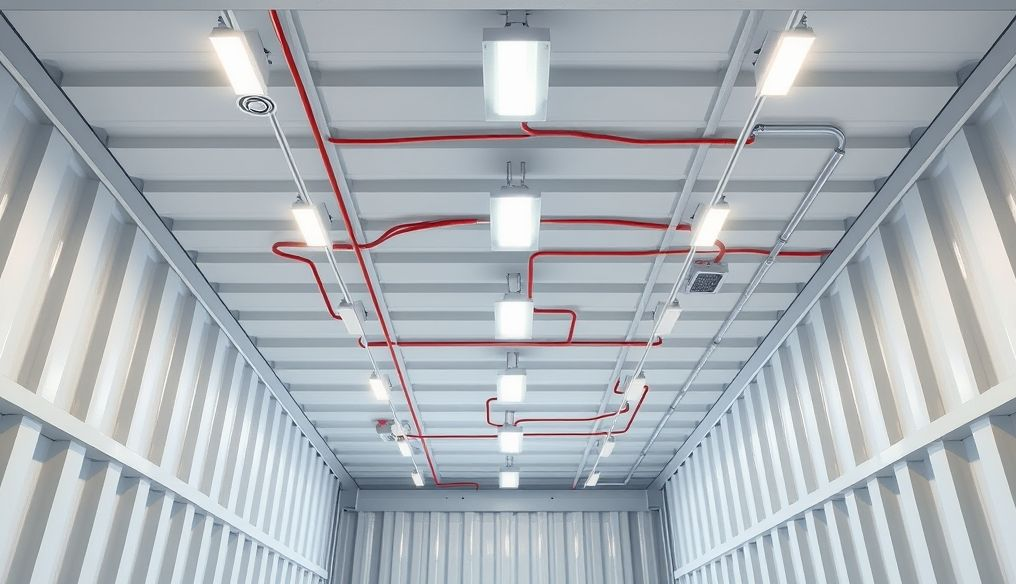
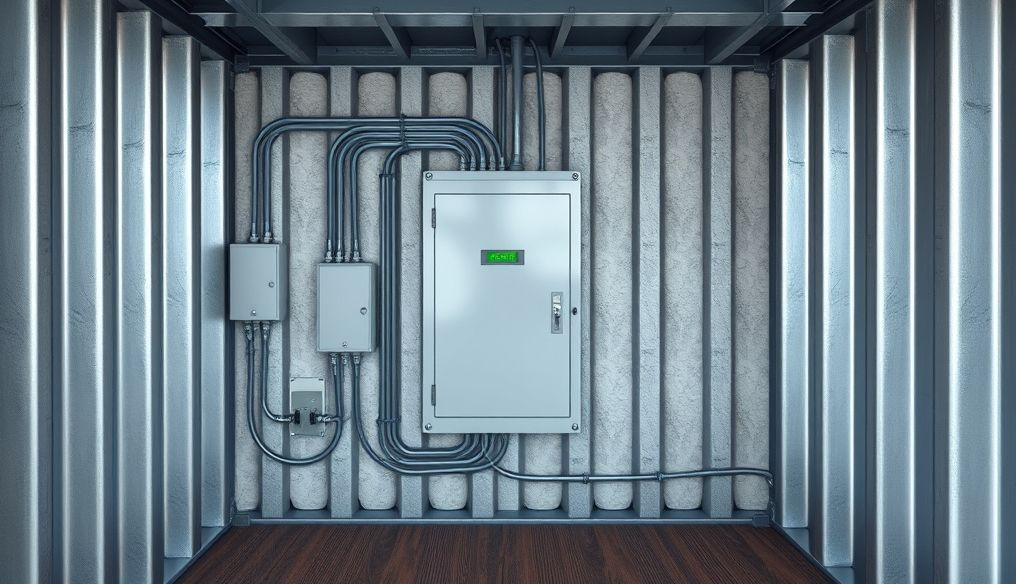
The Electrical Pitfalls Hidden in Steel:
-
A container is a grounded steel shell. Mistreating it like framed lumber risks shock hazards.
-
Common installer misses:
-
No GFCI protection
-
No system bonding or proper equipment grounding
-
Running Romex instead of encased conduit
-
⚡ Forum data shows average rewiring cost post-failure: $3,400 + two lost weeks waiting on a licensed contractor.
Recommended Components Smart Builders Use:
-
Weld-in lintel and jamb repair kits around cut openings
-
GFCI-protected load centers built for steel enclosures
-
12 AWG THHN wiring in EMT conduit
-
Plasma cutters (not grinder-only kits) for clean steel cuts
Safety Considerations: Protecting Yourself and Your Build
Building a shipping container garage is a hands-on project that comes with unique safety challenges. Always prioritize your safety and the safety of anyone helping you. Start with the basics: wear gloves, safety glasses, and a hard hat when handling shipping containers or working with power tools. Steel edges can be sharp, and heavy container doors can cause injury if not handled properly.
Make sure your shipping container is properly anchored to the ground before you begin any major work. This prevents shifting or tipping, especially during construction or in high winds. Regularly inspect your container for structural damage, rust, or weak spots—addressing these issues early helps maintain the integrity of your container garage.
Be aware that some used containers may have been treated with chemicals or could contain hazardous materials like asbestos, especially in older models. If you suspect your container has hazardous materials, consult a professional for safe removal.
By following these safety guidelines, you’ll protect yourself, your team, and your investment, ensuring your shipping container garage is built to last.
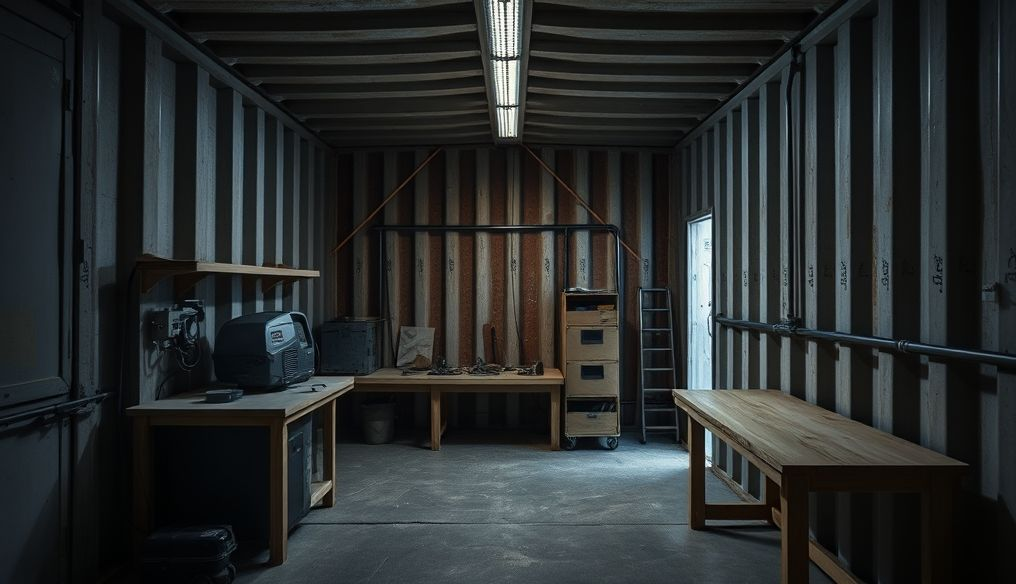
Tools and Materials: What You Really Need (and What to Avoid)
A successful shipping container garage build starts with the right tools and materials. At a minimum, you’ll need a drill, screwdriver, hammer, measuring tape, level, and a sturdy ladder. For the build itself, invest in a quality shipping container, a concrete slab or other proper foundation, and durable doors—garage doors or roll-up doors designed for steel construction are ideal.
When it comes to roofing, shipping container roof kits offer a cost effective and weather-resistant solution, especially if you’re joining multiple containers or want to add a shipping container carport. For insulation, closed-cell spray foam insulation is the gold standard for maintaining temperature inside and preventing condensation.
Avoid cutting corners with low-quality tools or materials, as these can compromise the structural integrity of your container garage and lead to costly repairs. Choose materials that are designed for steel construction and consider sustainable options where possible to minimize your environmental impact.
By equipping yourself with the right tools and materials from the start, you’ll set your shipping container garage up for long-term success.
Why YouTube Builds Mislead First-Time Converters
Even the best YouTube series are edited for visual impact, not for realism — and they all skip the bureaucratic middle: permitting, inspection delays, or seasonal limitations like curing concrete in winter.
Let’s compare inspiration builds vs. practical-functioning garages, and see how they stack up against a traditional garage:
|
Feature |
Inspiration Build |
Functioning Container Garage |
Traditional Garage |
|---|---|---|---|
|
Foundation |
Instant install on blocks |
Engineered with frost-depth footers + anchors |
Concrete slab, requires excavation and curing |
|
Insulation |
Reclaimed insulation board |
Closed-cell spray foam with vent layout |
Fiberglass or foam, framed walls |
|
Electrical |
DIY plug-in wiring |
GFCI + grounded circuits installed to code |
Wired to code, often higher cost |
|
Timeline |
3–4 weeks (edited) |
12–16 weeks with permits + inspections |
16–24 weeks, longer due to construction and inspections |
|
Code Compliance |
Rarely mentioned |
Passed-permit inspections at milestones |
Strict code compliance required |
|
Long-Term Usability |
Unclear |
Verified ventilation and insulation systems |
Proven durability, higher maintenance |
Shipping container garages are typically faster and less expensive to build than a traditional garage, which often involves more time, higher costs, and greater construction effort.
Be cautious of reclaimed materials or lighting systems prioritized for aesthetics. The ModBetter forum is full of builders replacing wood paneling that rotted from trapped humidity after just one winter.
What Strategic Frameworks Help Avoid Stalls?
You don’t need to be a pro — but you do need a pro decision process. Choosing your shipping container garage style is an important early decision, as it will influence the design, layout, and overall functionality of your project. These 4 planning frameworks separate stalled projects from successful builds. Reviewing shipping container garage ideas can help clarify your goals and inspire creative solutions.
During the planning phase, consider a few ideas for customizing your garage, such as optimizing the layout, adding storage solutions, or creating a dedicated workspace. It’s also crucial to know how to find containers that meet your specific requirements for size and condition. When planning, ensure you have enough garage space for your intended use, whether it’s for cars, motorbikes, boats, or additional storage.
1. 3-Phase Risk Map + Professional Input Points
|
Phase |
Key Risks |
Ideal Actions |
|---|---|---|
|
1: Site & Foundation |
Soil failure, frost heave, wind load |
Soil test, hire SE for loads |
|
2: Structure & Electrical |
Structural collapse, fire risk |
Steel pro for cuts, licensed electrician |
|
3: Finish Systems |
Mold, thermal bridging |
Spray foam, ventilation, inspector walk-through |
Use this flow to map when you must pull in pro support.
2. DIY vs Pro Cutoff Points
|
Risk Level |
Phase or Task Examples |
Recommendation |
|---|---|---|
|
HIGH |
Foundation, major structural cuts, routing electrical |
Hire it out or co-design with pro |
|
MEDIUM |
Spray foam insulation, installing vents |
DIY with vetted guides and specs |
|
LOW |
Painting, shelving, plug-and-play lights |
DIY friendly with minimal risk |
Don’t risk principle-level systems to save a weekend of labor.
3. Timeline Reality Adjuster
Whatever a YouTube video claims: multiply end-to-end duration by 2–3x if you’re building legally and safely.
Add time for:
-
Permit procurement (2–8 weeks)
-
Foundation engineering & inspection
-
Electrical layout approval
-
Rework cycles
-
Weather downtime
Our data shows the average fully permitted container garage project takes 14–18 weeks, not 3.
4. Materials Decision Tiers
|
Component |
Good (Low Cost) |
Better (Somewhat Durable) |
Best (Code-Pass + Lasting) |
|---|---|---|---|
|
Foundation |
Gravel (no tie-down) |
Block piers (+ straps) |
Frost-depth footer + anchor system |
|
Insulation |
Fiberglass batts |
Open-cell spray foam |
Closed-cell spray foam |
|
Electrical |
Basic outlets (DIY) |
GFCI protection added later |
GFCI + grounded steel install |
Troubleshooting and Maintenance: Keeping Your Container Garage Problem-Free
Once your shipping container garage is complete, regular maintenance is key to keeping your space functional and secure. Inspect your container garage periodically for signs of rust, dents, or structural wear—addressing these issues early can prevent bigger problems down the road. Check the roof and insulation for leaks or damage, and repair any issues promptly to maintain a dry, comfortable interior.
A fresh coat of paint or sealant every few years will help protect your shipping container from the elements and extend its lifespan. Make sure your ventilation system is working properly to prevent moisture buildup and condensation, which can lead to mold or rust.
Keep the area around your container garage clear of debris and vegetation to reduce the risk of corrosion and pest infestations. By staying proactive with troubleshooting and maintenance, you’ll ensure your shipping container garage remains a reliable, problem-free space for years to come.
What To Do Next: Prep for a Functioning Container Garage Build
Building a container garage isn’t just cutting and configuring steel. It’s about navigating local codes, material science, and inspection sequencing — all while keeping a project on schedule.
Here’s your strategic to-do list:
-
Consider why you might use a shipping container for your garage project—shipping containers are practical, durable, and weather-resistant, making them ideal for secure, long-lasting structures.
-
Start With the Site
-
Pull zoning requirements
-
Check wind/seismic zone rating
-
Use our frost-depth lookup guide
-
Structure Your Planning by Phase
-
Decide if you want a car garage, shipping container workshop, shipping container shop, or storage space.
-
If combining multiple containers, ensure they are the same size for a seamless build.
-
Download our 3-phase checklist
-
Sketch cut plans and vent paths
-
Pre-map inspections to calendar timelines
-
For smaller projects, consider building with a single container or one container for a compact, efficient solution.
-
Buy Materials Like an Inspector’s Watching
-
When selecting containers, choose cargo containers that are cargo worthy to ensure safety and reliability.
-
Consider a high cube container for extra headroom if you need more vertical space.
-
Use GFCI-rated circuits
-
Anchor systems matched to exposure category
-
Insulation that doesn’t trap moisture
-
Avoid “Saving” Where It Later Costs
-
Every skipped anchor bolt or DIY wire can double your budget later
-
Forums show insulation mold re-dos averaging $1,700+
-
When planning modifications, you may need to remove or alter interior walls to create a larger open space.
-
Incorporate natural light with windows or glass garage doors for a brighter, more inviting workspace.
-
For comfort, include a mini fridge for refreshments during long projects.
-
Use a shipping container shed for secure storage of seasonal items like Christmas lights.
-
For expanded layouts, arrange parallel shipping containers, two parallel shipping containers, or parallel containers to create larger, sheltered spaces.
-
Using two containers can provide more room for a workshop or to park multiple cars.
-
Design your garage for multiple cars, a single car, or to work on a car inside the container, depending on your needs.
Frequently Asked Questions
Do I really need a permit for a container garage?Almost always — especially if wired, anchored, or over 200 sq ft. Check local thresholds. Most jurisdictions treat container garages as permanent structures.
What happens if I skip proper anchoring?Your container may shift or lift during storms. Most inspectors won’t pass unanchored installations. You could face total foundation replacement.
Can I insulate with fiberglass to save money?Not if you care about durability. Condensation will build between the steel walls and fiberglass. Closed-cell spray foam is significantly more reliable.
Is DIY electrical legal and safe in a container build?Technically possible in some counties, but rarely recommended. Containers need proper grounding, GFCI circuits, and conduit — best done by pros.
How do I avoid condensation inside my container garage?Closed-cell spray foam + clear ventilation design. Use roof fans, passive vents, and avoid creating double vapor barriers.
Should I buy a new or used container?A used container can save you significant money compared to a new one. However, check for signs of rust, dents, and other wear. You may need to handle repairs or maintenance before using a used container for your garage project. New containers cost more but usually require less work to prepare.
Conclusion: Build Smart, Not Just Bold
DIY container garages don’t fail from lack of effort. They fail because crucial details — anchoring, insulation chemistry, cut reinforcement, and wiring safety — get missed.
Get ahead by using frameworks for each build phase. Delay mistakes by mapping which parts are truly DIY-safe. And stop relying on time-lapse inspiration that skips permitting and weather delays.
ModBetter is here to help.
Let’s build better, smarter, and above all — to code.